
So here I am now, blogging about my first post this year, my first challenge in the club, and my first swiss roll.
Honestly, I was freaked out reading the challenge... Oh no, JRC or Japanese Roll Cake? Junko's Japanese style Swiss Roll? with cute drawing on the roll? I've never baked swiss roll or roll cake before. I read that people often have issues on rolling the cake and it cracks. While thinking the best way to meet the challenge, I read the members' posts in the KBB maillist, many have problems already... It seems that this JRC or Japanese Roll Cake is more difficult than the ordinary roll cake. My confidence was sliding down the floor and melt like a marshmallow on a campfire. What can I do? When Junko post it in her blog (in japanese only), this kind of swiss roll (she named it Deco Roll) instantly hit the top. Oh no, don't look at my "towel" cake photo, that's the ugly failed one, far from kawaii or cute.. look at all the deco roll posted on her blog (at least you can look at the pictures, no?), then you will understand why people immediately fall in love to this kind of swiss roll. They are amazing! And me, after visiting Junko's blog, I think I caught the bug...


You might wonder.. towels? No, those are from my second attempts baking swiss roll
The challenge was sent with a recipe from Ibu Rachmah Setyawati, with detail instruction on how to draw design with cake batter. She posted her Sweet Green Polka Dots Japanese Roll Cake on her blog in October last year. Using recipe from Junko's book and modified it a little. That was the one sent to us for our challenge. In total I tried 3 times, the first and second attempts were disaster... you can see what I came up with from the "towel" picture above. Not only that they didn't raise well, they were wrinkle like the skin of that "towel dog" Chinese Shar Pei... This challenge really made me think hard how to solve those problems. The cake is supposed to be airy soft and smooth. I realised that I didn't fold the batter properly during mixing and I lost too much air from the batter. Let me explain how to make drawing design on this kind of swiss roll. Before pouring the main batter, we have to make design or drawing using colored batter on a parchment paper that used to line the bottom of the baking tray. Freeze or quick-bake to set, cover with main batter and bake as usual. While doing the batter-drawing, I noticed that the moisture from the batter seeps into the parchment paper and makes it wrinkle. So, the solution I can think of are folding and mixing the batter carefully not to lose air, and using water resistant liner to line the baking tray or using silicone baking tray. Well, I don't have silicone baking tray, but I have this reusable silicone/parchment baking paper like this Kitchen Supply Parchment Paper (not paper actually), that can be cut to fit the tray. I wonder also if we can use wax paper or lightly oil the parchment paper? Maybe for the next experiment.
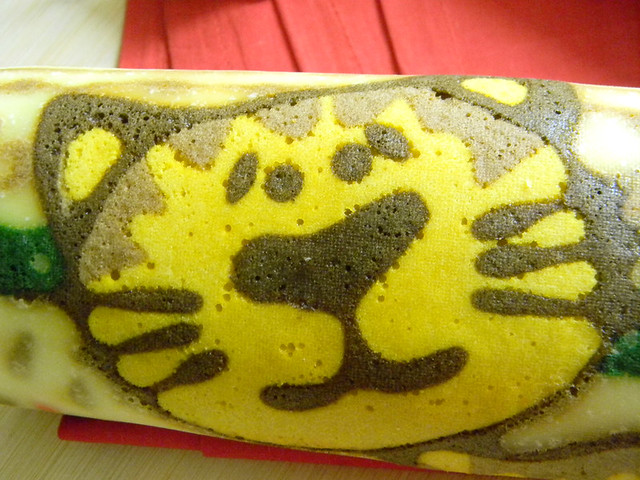
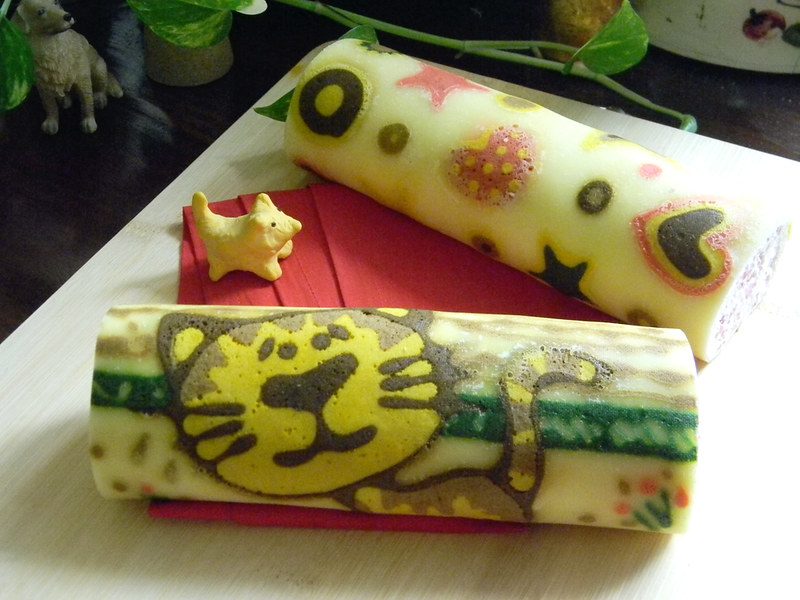
Taking care not to over-mix, the result from the third try was good. It seems that whisking egg white to the right consistency (soft peak) and mixing/folding the batter play a very very crucial role here. I enjoyed drawing the designs with different color.
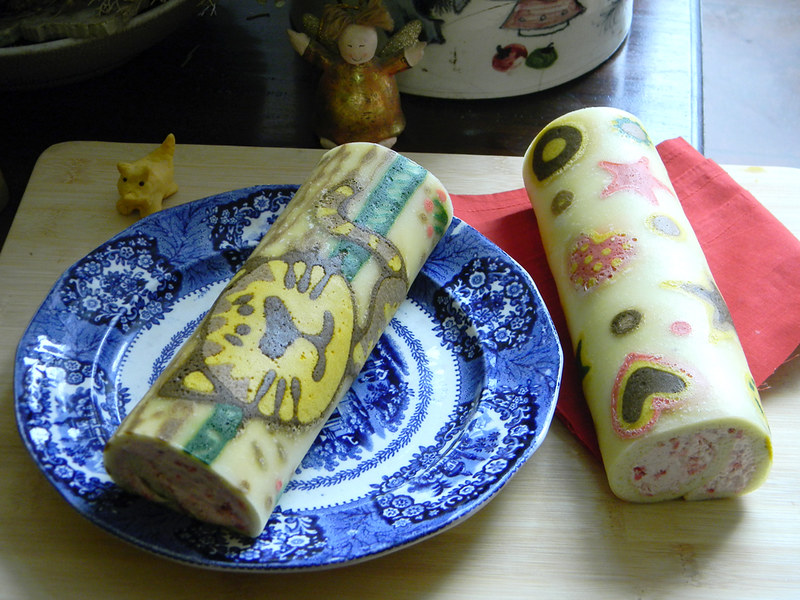
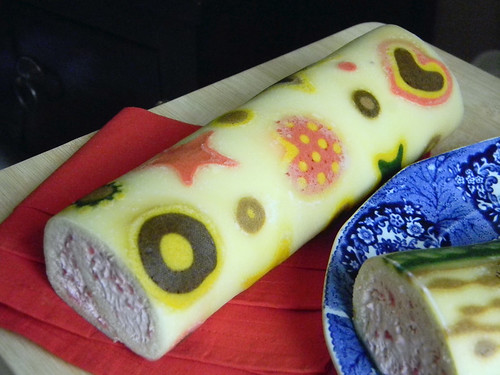
The cake recipe is based on sponge-cake recipe, using mostly white eggs. That's why it's a little bit "springy" when you bite on it, but I see that it minimize the risk of cracking when we roll and shape the cake. It's nicely soft, and with a good flavor for the creamy filling you'll have the best roll cake, in appearance, texture, and flavor. A complete package.
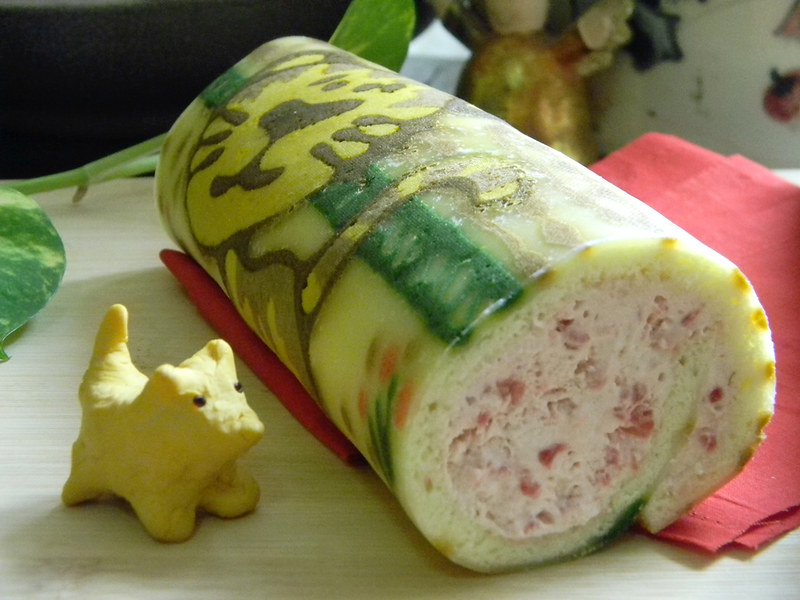
For the filling, on the second attempt (the "towel" swiss roll) I simply whip heavy cream and mix in the frozen mango puree (Gedong Gincu mango) I have in my freezer, no sugar added since the mango puree is already sweet enough from the mango. For the good third swiss roll, I use frozen raspberry and since the frozen raspberry is not sweet enough, I added honey to sweeten. Appears to be a good flavor combination.. raspberry and honey.
The recipe from KBB is good, but I see that the batter for drawing is way too much (well, at least for my design), so I reduced and separated just enough volume using Junko's technique.
KBB#32: Rolls Nice - Japanese Roll Cake (JRC)
Painted Swiss Roll with Fruit and Cream Filling
Adapted from the Recipe on KBB blog (Challenge #32) and Junko's book.
Batter I
4 egg yolks
35 g sugar
40 g vegetable oil
60 g milk
80 g cake flour
Batter for drawing/design :
Batter I
4 egg yolks
35 g sugar
40 g vegetable oil
60 g milk
80 g cake flour
Batter for drawing/design :
1 (30
g) egg whites
7 g sugar
10 g cornstarch
7 g sugar
10 g cornstarch
Batter II
6 (160-175 g) egg whites
a pinch of salt (0,5 g)
50 g sugar
6 (160-175 g) egg whites
a pinch of salt (0,5 g)
50 g sugar
1 tsp lemon juice
15 g cornstarch
Food colorings, several different colors according to your design.
For the filling
(make this while cooling the cake, or make in advance and put in your fridge, take out from the fridge about 10-15 minutes to soften)
200 ml heavy cream, cold, whisk to soft peak
15 g cornstarch
Food colorings, several different colors according to your design.
For the filling
(make this while cooling the cake, or make in advance and put in your fridge, take out from the fridge about 10-15 minutes to soften)
200 ml heavy cream, cold, whisk to soft peak
5 tbsp of fruit puree (mine was frozen mango purée) or
150 g Frozen raspberry, sweeten with honey
Mix all together and set aside.
Preparation
Prepare 2 swiss roll baking trays (18x18 cm) , and lined with reusable parchment baking paper (see the explanation above).
If you want, you can put your design paper under the parchment to make it easier for you to trace and draw your design.
No need to oil or butter the trays.
Batter I - egg yolk batter
- Using an electric mixer, whisk in medium speed the egg yolk with sugar until creamy and light yellow color. Add oil, continue mixing in medium speed, then add milk a little at a time. Pour the flour into the batter in 3 additions and continue mixing in medium speed until the batter is smooth.
- Preheat your oven to 150 oC.
- Whisk the egg white with the sugar to soft peak consistency, add the cornstarch in, continue whisking until well-mixed but taking care not to reach hard peak consistency. Set aside.
- According to how many colors you need for your drawing/design and how much for each color, prepare some small bowls.
- Take 1-2 tsp of egg-yolk batter for each color you need, and color each one with food coloring, then mix each color with 1-2 tsp of whisked egg-white. Proportionally, you should have 1 part of egg-yolk batter for 1 part of whisked egg-white.
- Put each color in a small pipping bag. Snip the tip just a little bit, just enough for the batter to be squeezed out for drawing lines.
- Draw your design on the reusable parchment paper inside the baking tray that you have prepared before.
- Bake for 30 seconds in the preheated oven. Sometimes you need to bake two or three times depends on the design. Make sure that it is not more than three times, or you will have biscuits that will easily fall off from the cake.
- Set aside your half-cooked design and make the main batter.
- Increase the heat in your oven to 160-170 oC.
- Take the remaining egg yolk batter. If you want, you can color the batter at this stage (I didn't color mine). Set aside.
- With an electric mixer in medium speed, whisk the egg whites until foamy. Add the sugar and salt, and continue whisking until soft peak consistency. Add the lemon juice too. Mix the cornstarch in, continue whisking until well-mixed but being careful not to reach hard peak consistency.
- Take approximately 1/5 of the whisked egg whites and mix with the remaining egg yolk batter. Carefully folding the batter until both are well incorporated.
- Add the rest of the whisked egg whites, fold carefully to incorporate taking care not to lose too much air.
- Pour carefully onto your half-cooked design, half batter in each tray.
- Bake in the preheated oven for 15 minutes. Not longer.
- Take our from the oven and let cool.
- Run a knife on the edges of cake to loosen it from the tray, flip it over on a plate, a tray or a piece of parchment paper. Peel off the parchment lining paper to reveal the drawing design, and flip the cake over once again on a piece of parchment paper so the drawing/design is now at the bottom of the cake.
- Spread half the filling onto one cake.
- Using the parchment paper, carefully roll the cake. Wrap the roll with the parchment paper and put in the fridge for at least 2 hours to set.
- Do the same with the remaining cake and filling.

Thank so much for this!!! I have the sanpme problem with the wrinkling, and i believe your post has answered to all of my question <3 im going to triec both the oil greased method, the freezing and the new teflon parchment to compare the result!!
ReplyDeleteBtw love your designs : D
Ami
Hi, thanks Ami.. hope you have good result with your 2 tries.
DeleteHello ! I just baked one today ,freezed the pattern , but the pattern remained on to the parchmnt paper after baking why has this happend plz help?
ReplyDeleteHello.., you might need to pipe the pattern thicker, and make sure you use the real parchment paper and not wax paper or baking paper. The consistency of the batter you use for the pattern is also crucial. Make it a little bit heavier/thicker than the main batter. Good luck and I hope this could solve the problem.
Delete